MicroVoxels & Material Profiles
advanced conceptsVoxel Play 4 · World Architecture
"MicroVoxels" let you specify or change the shape of a single voxel (cube). In Voxel Play 4 they also carry custom color palettes and material profiles, enabling detailed decorations with per-cell coloring and dual-material surfaces like grass-over-dirt terrain.
By default, all Voxel Play 4 regular voxels use a 1x1x1 cubic shape. A voxel can have microvoxels or not. By default, no voxels have microvoxels. When a voxel has microvoxels enabled, Voxel Play 4 does not generate the default 1x1x1 cubic shape but a custom shape. This shape is constrained to the 1x1x1 cubic volume but allows you to define a more detailed aspect.
By default, microvoxels inherit the color and textures of the occupying voxel, so a plain microvoxel shape simply reshapes the cube. Voxel Play 4 goes further: each cell can carry its own color through a palette, and shapes can route cells to a secondary material for dual-surface effects. These features are covered below.
A slab is just half a voxel filled with microvoxels. The sample character controllers support "slab mode" which just calls the proper API (MicroVoxelPlaceSlab or MicroVoxelDestroySlab) in this mode based on the crosshair.
Color Palettes
Each microvoxel shape can have a palette of up to 255 colors. Individual cells reference a palette slot, allowing detailed coloring within a single voxel.
- palette: a
Color32[]array storing the available colors - colorIndices: a
byte[]with 4096 entries (16x16x16), one per cell. Value0= use parent material color. Values1..N= usepalette[N-1]
Requires Enable Tinting in the VoxelPlayEnvironment settings to render palette colors at runtime.
Layout Modes
The MicroVoxelLayout enum controls how primary and secondary materials are distributed across the microvoxel cells:
public enum MicroVoxelLayout {
    Default = 0, // Standard microvoxel layout (single material for all microvoxels)
    Slabs = 1,   // Bottom/top slab use different voxel definitions/textures
    TopCap = 2   // Bottom slab uses top-half texture (useful for terrain surface)
}
| Layout | Behavior | Use case |
|---|---|---|
| Default | All cells use the primary material | Standard decorations, furniture, details |
| Slabs | Horizontal split at secondaryTypeHeight. Cells below use primary, cells above use secondary material. | Grass-over-dirt, snow-over-rock terrain surfaces |
| TopCap | Side faces of the bottom half use the top-half texture from the secondary material | Terrain surface caps where sides need to show the top texture |
The secondaryTypeHeight field (0-16) controls where the split occurs in Slabs mode. Default is 8 (midpoint). When microvoxels are created for a voxel they are assigned the Default layout initially, so every cell uses the same voxel definition until you change the layout.
Material Profiles
A VoxelMaterialProfile is a ScriptableObject that stores texture and PBR properties for a voxel surface. Each profile has per-face textures (top, side, right, forward, left, bottom) with optional normal, displacement and PBR maps.
Setting Up Dual Materials
- Create a VoxelMaterialProfile asset (Create > Voxel Play > Voxel Material Profile)
- Assign the secondary textures (e.g. grass textures for the top layer)
- On the VoxelDefinition, assign the profile to the Secondary Material Profile field
- Set the microvoxels layout to Slabs and adjust
secondaryTypeHeight
At runtime, the engine creates an internal shadow VoxelDefinition from the profile and uses it for the secondary material zones.
Per-Quad Material Routing
When using palettes, individual cells can override which material is used regardless of the layout mode. This is encoded in the alpha channel of the palette color (bits 7-6):
| Mode | Alpha bits | Behavior |
|---|---|---|
| INHERIT | 00 | Use the layout rule (Slabs/TopCap height threshold) |
| PRIMARY | 01 | Force primary material regardless of position |
| SECONDARY | 10 | Force secondary material regardless of position |
This enables fine-grained control: a single microvoxel shape can have some cells using grass textures and others using stone, independent of their vertical position.
Painting Cells at Runtime
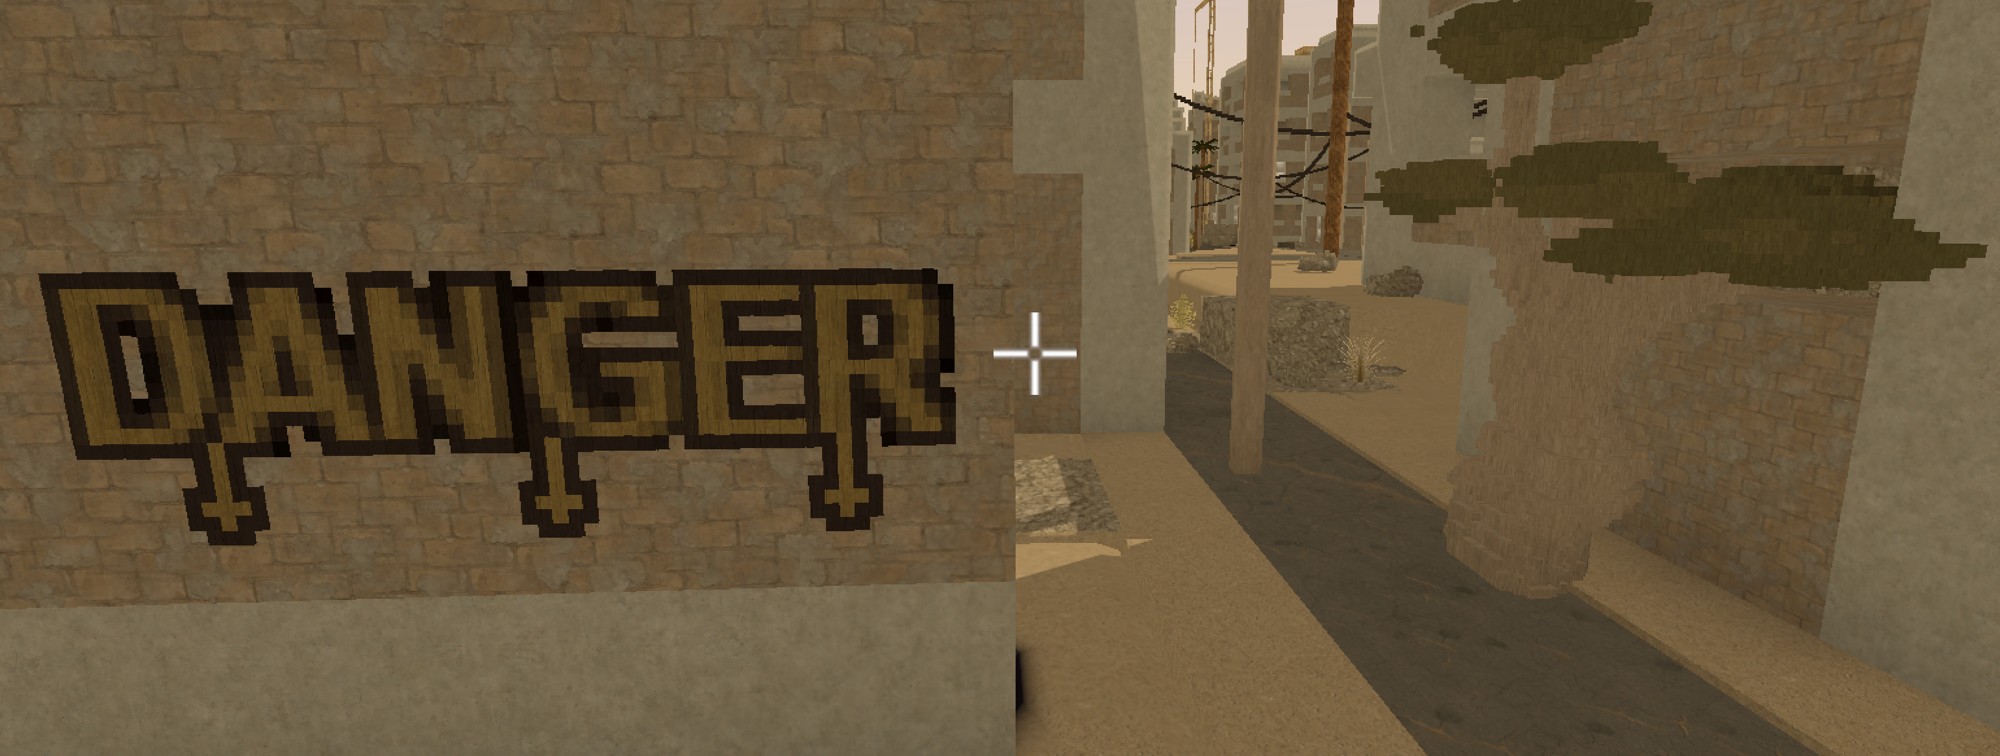
bool MicroVoxelSetColor(Vector3d position, Color32 color);VoxelPlayEnvironment.MicroVoxelSetColor paints the microvoxel cell at a world position with a color, managing the palette for you. If the position holds a plain full voxel it is converted to a full 16x16x16 microvoxel grid first, so any solid surface can be spray-painted. Painted colors persist in saved games. Demo 1 (Earth) uses it for its graffiti mode: press P, then hold the left mouse button and drag to spray.
PBR Surface Maps
VoxelDefinitions support full PBR maps per face. For each face direction (top, side, right, forward, bottom) you can assign:
- Metallic, Smoothness and Occlusion maps (e.g.
textureTopMetallic,textureSideSmoothness,textureBottomOcclusion) - Emission maps for self-illuminated surfaces (
textureTopEmission, ...)
These separate maps are combined into a single packed surface map for rendering. Use the editor's surface-map packing utility, or pack at runtime with TextureTools.PackSurfaceMap() (see the scripting reference).
MicroVoxels Address Space
In the VoxelPlayEnvironment inspector there's a setting called MicroVoxels Size:

This setting defines the number of microvoxels per voxel, in a similar way that the chunk size determines the number of voxels in a chunk (along any axis). By default, the MicroVoxels Size value is 16, which means each voxel can be subdivided into 16x16x16 microvoxels.
Note that MicroVoxels do not add extra memory consumption by default if they're not used. This setting just configures the address space for microvoxels (how tiny they can be).
Demo Scene
The demo scene 1 shows a few use cases for microvoxels:
- The terrain generator uses microvoxels to render half voxels. This setting can be found in the Terrain Generator associated with the world definition.
- In playmode, you can enter build mode pressing B (to have access to all inventory), press Tab to open the inventory and select any voxel and press V or M to toggle microvoxels mode or microvoxel size and place/destroy them in the terrain. These features are implemented with the provided API such as MicroVoxelDestroy / MicroVoxelPlace, etc.
- Press "H" to toggle slab mode. The slab mode overrides the microvoxel placement. You can either place a slab or a microvoxel.
Creating and Saving MicroVoxels
MicroVoxels can be added or removed at any time using the API methods or the default character controllers. Any voxel that uses microvoxels stores this data into the savegame file automatically; the savegame format (v15) includes the microvoxels data per chunk.
In the demo scenes, you can enable the microvoxels by pressing the V key. Then, depending on the item carried, you can remove or add microvoxels to the scene. An item can define the microVoxels property to determine the size of the tool so it determines the size of the microvoxel being placed or removed.
Creating Microvoxels in the Editor
Select a VoxelDefinition asset and expand the Microvoxels section in the inspector. Available tools:
- Clear: Remove all microvoxel data
- Bottom Slab / Top Slab: Fill half the voxel
- Custom Height: Fill a specific number of layers (0-15)
The inspector shows a 3D preview of the shape (click to rotate) and a layer diagram.
Alternatively, create a standalone MicroVoxelsDefinition asset and reference it from multiple VoxelDefinitions to share shapes.
Building MicroVoxels from Code
Procedural generators can author MicroVoxels directly: create the object, set occupancy with SetOccupied(x, y, z) (index layout x + z*16 + y*256), and pass it to VoxelPlace(..., microVoxels: mv). Two rules keep this safe:
- Sharing is managed by the system. The engine clones shared instances before mutating them (copy-on-write), and an instance stored in a second cell is promoted to
isShared = trueautomatically - so multi-cell shapes are safe by default. The flag stays public as an override: set it totrueyourself when a single-cell instance must behave as immutable (e.g. a template you keep a reference to), and only force it back tofalseif you deliberately want in-place mutation of a multi-cell shape. - For colored microvoxels, assign the palette before anything captures it. A cell is colored by setting
mv.palette(aColor32[]) plusmv.colorIndices(one byte per microvoxel: 0 = no override, k = palette[k-1]). If you build shapes in static initializers, declare the palette field above the builders - C# initializes statics in declaration order and a palette declared below is still null inside them.
To stamp a shape set spanning several cells (a prop rasterized into a different MicroVoxels per voxel), use the batch overload VoxelPlace(positions, voxelType, microVoxelsList): it places one shape per position and refreshes the affected chunks once per batch (see the scripting reference).
Colored microvoxels require Enable Tinting on the environment; the tint multiplies over the definition's texture. Since worlds can mix authored and code-built content, the engine logs a warning at initialization when colored microvoxel definitions exist but tinting is off. Fully occupied cells normally take a fast path that renders them as plain voxels; cells carrying a palette are excluded from it so their colors always render.
MicroVoxels API
Methods are available to place/remove microvoxels. Check the Scripting C# Methods page for details.
Technical Considerations
MicroVoxels add extra mesh (triangles) to the scene. The difference with custom voxel definitions is that the microvoxels produce runtime/procedural meshes which are generated natively and optimized by Voxel Play 4 meshing algorithms and these triangles are part of the regular chunk meshes so they don't need extra drawcalls.
MicroVoxels data is stored in a packed format inside each chunk. If a voxel does not use microvoxels, there's no extra memory consumption.
Generating Thumbnails
The MicroVoxels class provides a GenerateThumbnail method that renders a preview image of the microvoxel shape. This works both at runtime and in the editor. It creates a temporary camera and render texture internally, so no scene objects are affected.
// Generate a 256x256 thumbnail
Texture2D thumbnail = myVoxelDefinition.microVoxels.GenerateThumbnail(256, 256);

// Save to PNG
byte[] png = thumbnail.EncodeToPNG();
System.IO.File.WriteAllBytes("thumbnail.png", png);

// Remember to destroy the texture when done
Destroy(thumbnail);
Parameters:
width(optional, default 256) - thumbnail width in pixels.height(optional, default 256) - thumbnail height in pixels.
The method returns a Texture2D with the rendered preview, or null if the microvoxels are empty. The caller is responsible for destroying the returned texture when it is no longer needed. Must be called from the main thread.
See Also
- OBJ Export - Export microvoxel models with textures to external tools
Suggest an improvement
Help us improve this documentation page.