Quick Start
Highlight Plus for Unreal · Quick Start
The look of the effects is stored in a Highlight Plus Profile, and a Highlight Plus component shows that look on an actor. If the plugin is not in your project yet, add it first as described in Installation.
1. Add the component to an actor
- Select an actor in the level.
- In the Details panel, click Add and search for Highlight Plus.
2. Create a profile
- Select the new component. Open the list of Profile and, under Create New Asset, select Highlight Plus Profile.
- Choose a folder and a name. The new profile is assigned to the component.
- The settings of the profile appear under the component, grouped by effect. A new profile has a black outline. Change Outline Color, or raise Glow, Inner Glow or Overlay to add more effects.
You can also create a profile in the Content Browser: click Add, then Data in Unreal Engine 5.8 or Miscellaneous in 5.6 and 5.7, and select Highlight Plus Profile.
The actor shows the effects in the editor and in the game. The Details panel has a Highlight Plus tab that shows only the settings of the plugin.
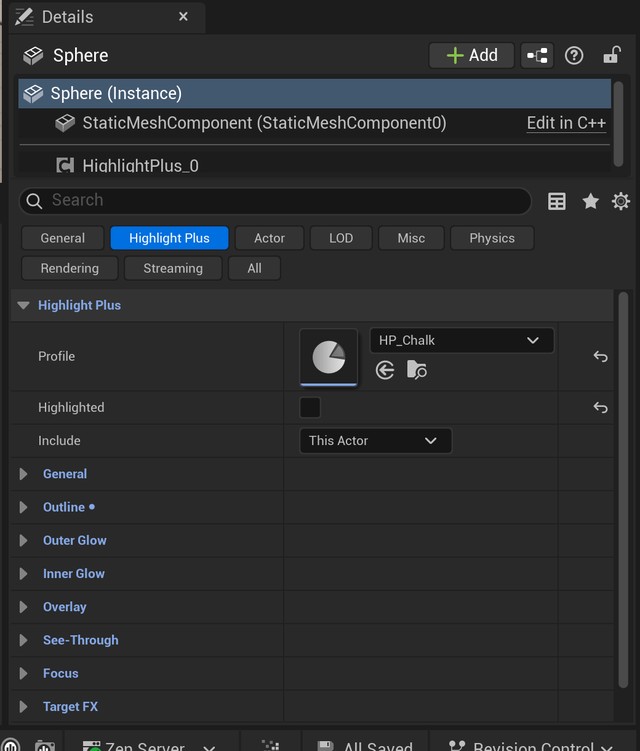
3. Show and hide the effects
Disable Highlighted on the component to hide the effects. In the game, call Set Highlighted on the component from a Blueprint.
4. Highlight without a component
The Highlight Actor node shows the effects of a profile on any actor, and Stop Highlight removes them. The actor does not need a component. See Blueprint Nodes.
5. Highlight by pointer or by proximity
Add a Highlight Plus Manager to the level to highlight the actors that the player points at or gets near. You do not need any Blueprint. See Highlight Plus Manager.
See Profile Settings for the description of every setting and Demo for the demo level.
Suggest an improvement
Help us improve this documentation page.