Quick Start
Lines Plus for Unreal · Quick Start
There are two ways to draw a line. You can place a Lines Plus actor in the level, or you can call a draw node from a Blueprint or from C++. If the plugin is not in your project yet, add it first as described in Installation.
1. Place a line in the level
- In the Place Actors panel, search for Lines Plus and drag it into the level. If you do not see the panel, select Window > Place Actors. The actor draws a straight line with two points.
- With the actor selected, click a point of the line in the viewport and move it with the gizmo.
- Right-click a point and select Add Point to add a point after it, or Delete Point to remove it.
2. Change the look of the line
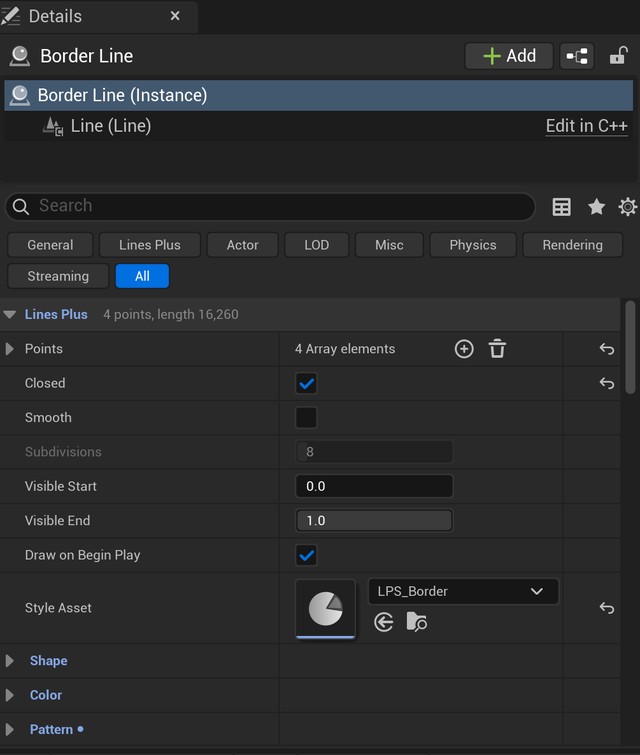
- Select the actor. The Details panel has a Lines Plus tab that shows only the settings of the plugin.
- Open the groups Shape, Color, Pattern, Caps and Animation and change the settings. The line shows each change at once.
3. Share a look between lines
- Open the list of Style Asset and, under Create New Asset, select Lines Plus Style.
- Choose a folder and a name. The new style is assigned to the line, and its settings appear in the same groups.
- Assign the same style asset to other lines.
The settings under a style asset belong to the asset. A change there also changes every line that uses the same asset. If you change the asset from code, call Update Lines on the asset.
4. Draw a line from a Blueprint
- In a Blueprint, add the node Draw Line from the Lines Plus category.
- Connect the Start and End positions. To change the look, drag from the Style pin and select Make Lines Plus Style, or use the Style value of a style asset.
- Keep the value that the node returns. You use it with the other nodes to change or to remove the line.
See Blueprint Nodes for the list of nodes and C++ for the use from code.
5. Add a line to your own actor
Select an actor, click Add in the Details panel and search for Lines Plus. The component draws one line with the same settings as the line actor. Its points are relative to the component, so the line moves with the actor.
See How To for the most common tasks step by step, Style Settings for the description of every setting and Demo for the demo level.
Was this page helpful?
Suggest an improvement
Help us improve this documentation page.