Doctor Window
beginner conceptsEditor Doctor Pro · Core Concepts
Doctor Window
The Doctor is the main scan window. It runs every check across the project, groups findings by module, and exposes one-click auto-fixes. Open it from Window > Kronnect > Editor Doctor Pro > Doctor.
Layout
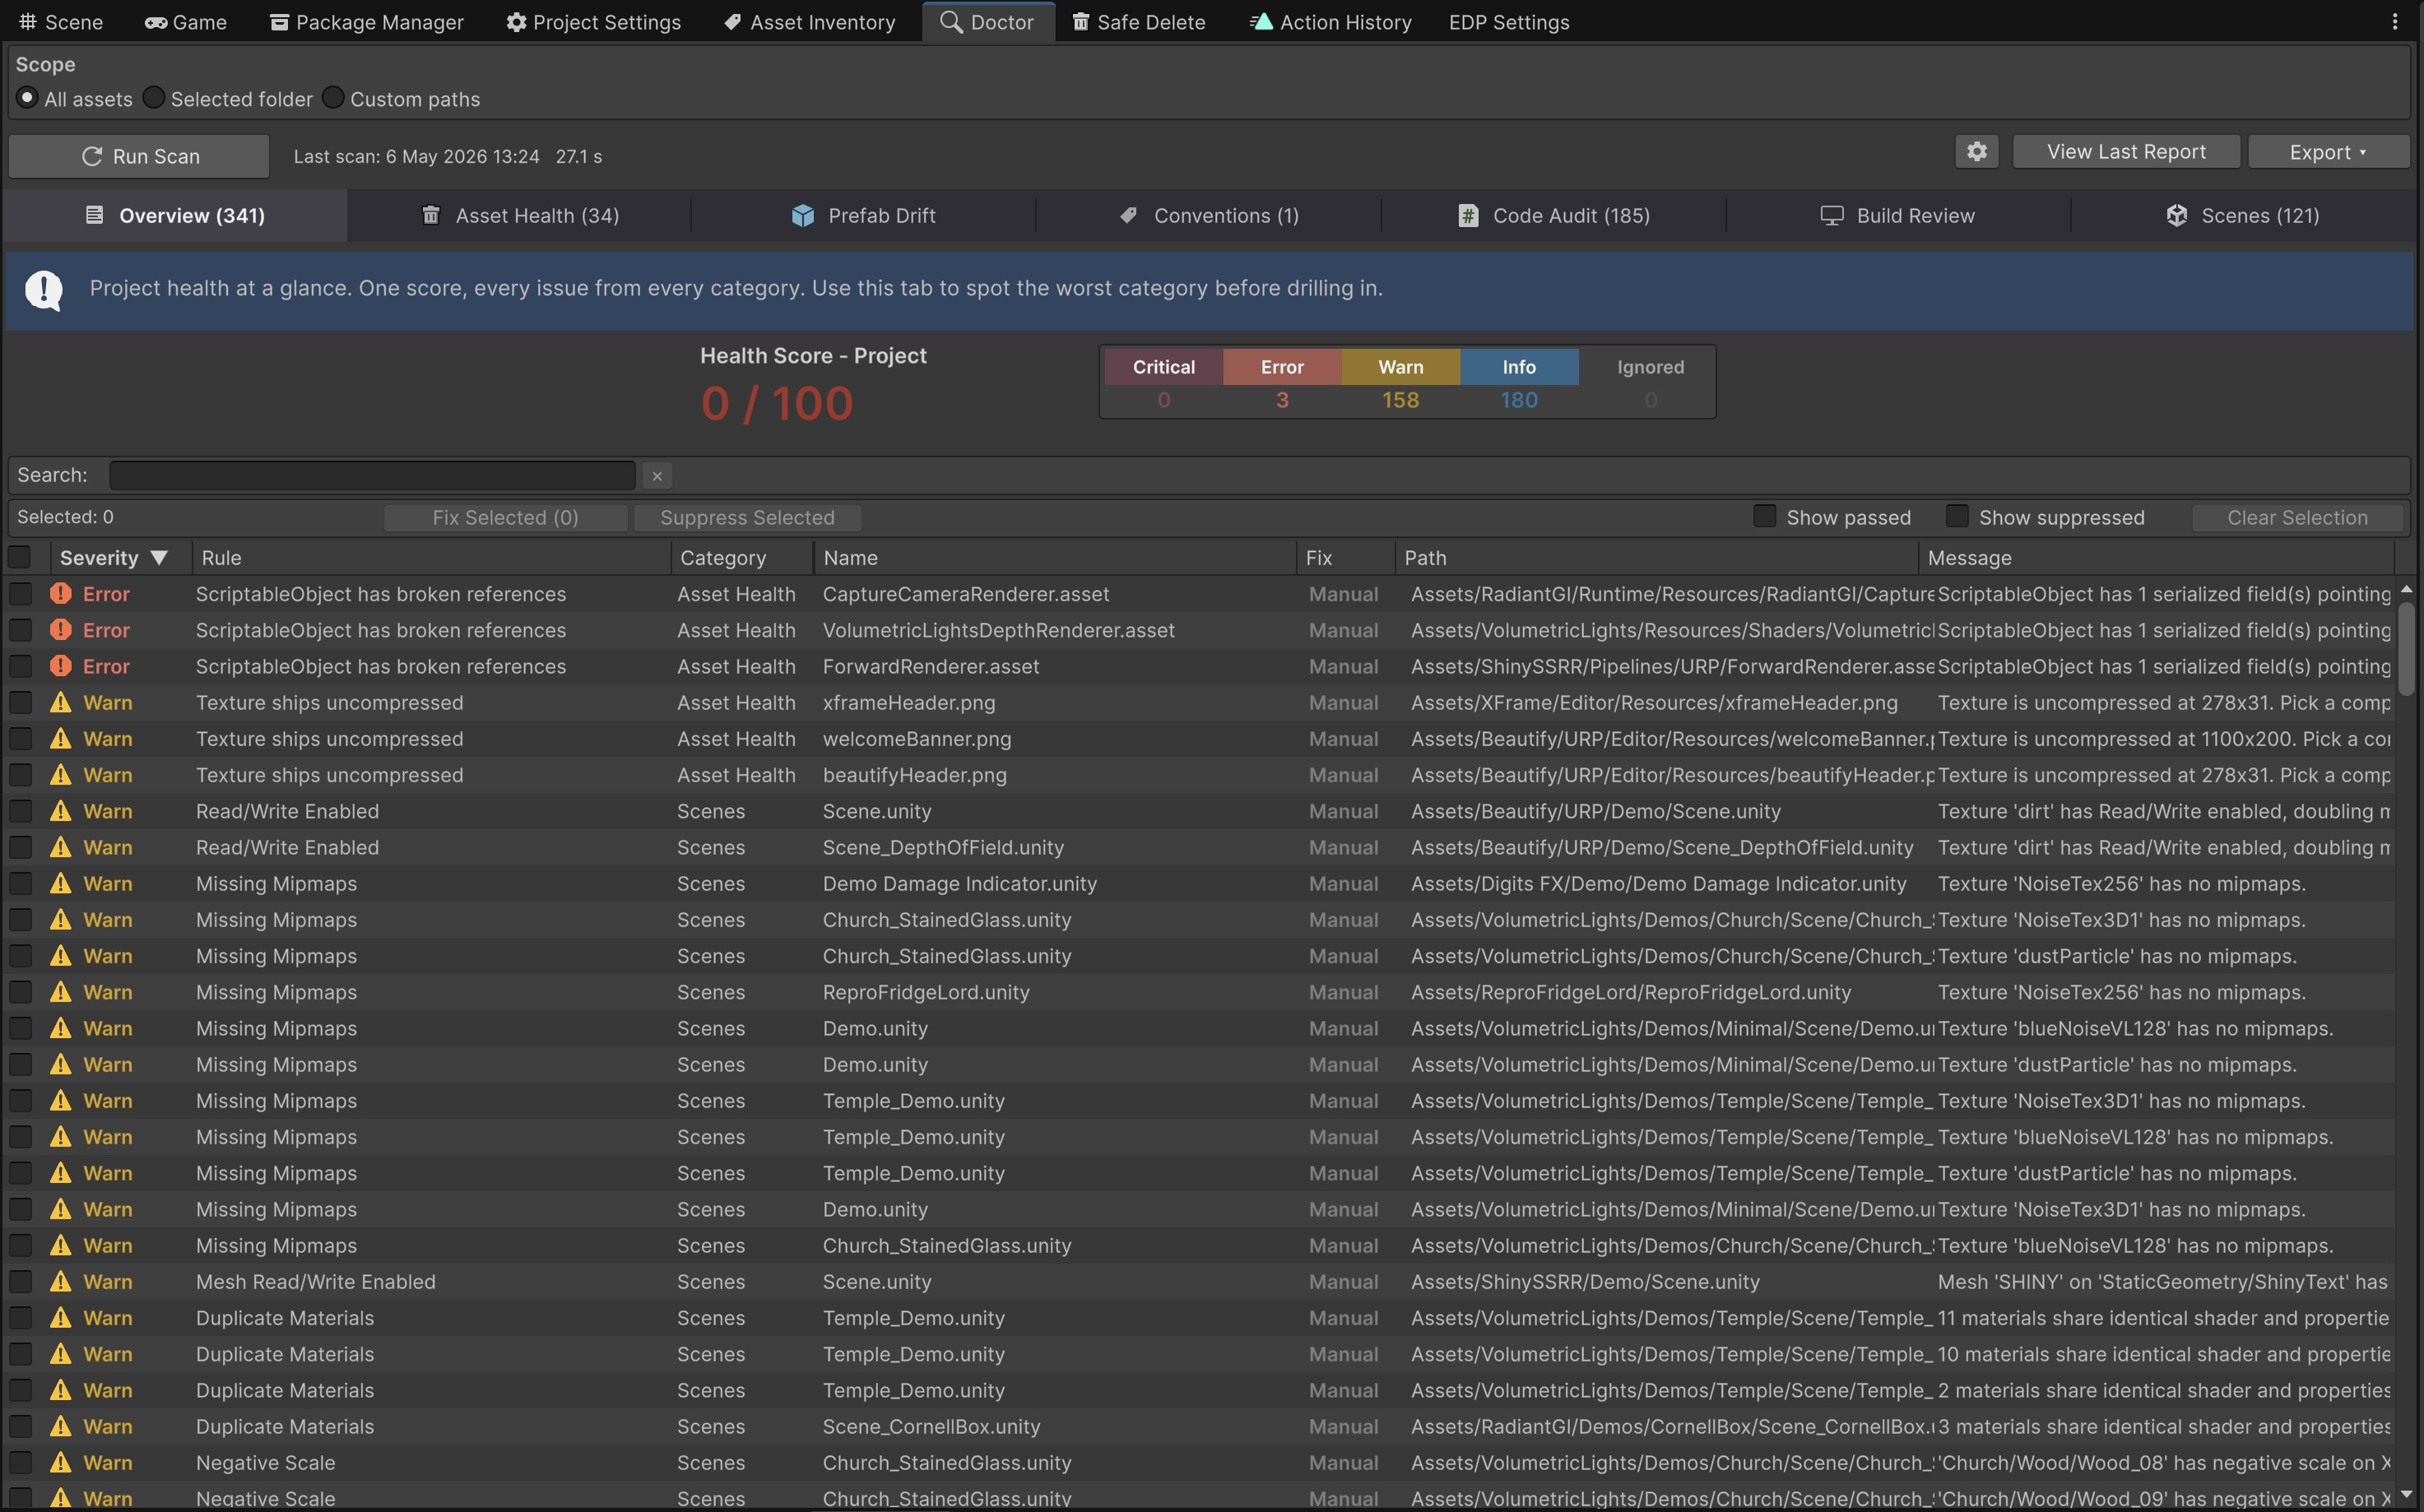
The window has five areas, top to bottom:
- Header - hero banner with the Run Scan primary button (or Cancel while a scan is in flight, with progress bar and percent), the project Health Score widget, and the scope picker (All assets, Selected folder, or Custom paths).
- Last Action strip - a thin coloured bar showing the most recent journaled action (icon + label + timestamp + asset count + summary), with inline Undo / Redo and History buttons. Disappears when the Action History is empty; greyed out when the action type is log-only (no automatic undoer). See Action History.
- Tab strip - one tab per module: Overview, Asset Health, Prefab Drift, Conventions, Code Audit, Build Review, plus Scenes when Scene Pilot Pro is installed.
- Filter bar - severity toggles (Critical / Error / Warn / Info), text search, fix-tier filter (Auto / Manual), and column sort. The whole filter set is persisted per-tab so you don't lose your view when switching modules.
- Findings table - one row per finding. Sortable columns: Severity, Rule, Category, Name, Path, Message, Fix (visibility and width persist per tab). Click any row to ping the asset in the Project window; right-click for the full action menu.
Run Scan button
The primary button toggles between two states:
| State | Behaviour |
|---|---|
| Idle | Click to start a scan with the current scope and tab. The button label is Run Scan. |
| Running | Click to cancel. The button label changes to Cancel, an inline progress bar paints at the bottom of the button, and a percent indicator shows progress. |
Scans run on the editor update loop (one check per ~16 ms tick), so the Project window, the Inspector and the bottom-right Unity Progress tray all stay responsive. If you switch scenes or trigger a domain reload while a scan is running, the scan cancels itself cleanly.
Overview tab
The Overview shows the headline state of the project:
- Project Health Score (0-100).
- Per-module breakdown: how many findings of each severity each module reported.
- Total findings count and how many are auto-fixable.
- Suppressed badge with the count of currently-suppressed issues.
- Last scan timestamp.
Module tabs
Every module tab has the same shape: filter bar, findings table, and an Apply All Auto Fixes button. The button shows the count of auto-tier findings in the current filter set; clicking it opens a confirmation dialog that lists every fix that will run, so you always know what is about to change. The whole batch reverts as a single Action History entry.
Row actions
Single-click a row to ping the asset in the Project window. Double-click to open it in its native editor. Right-click for the full action menu:
- Explain - opens the inline explanation panel with Why / Safe Fix / Risk for the check.
- Fix this finding - applies the fix for the right-clicked row (auto tier only).
- Fix selected (N) - applies the fix for every selected auto-tier row in one batch.
- Open / Open in IDE - opens the affected asset, or jumps to the offending line for Code Audit findings.
- Locate in Project - pings the asset.
- Copy Text - copies the row contents (check id + asset + message).
- Suppress this finding / Unsuppress - toggles per-issue suppression. See Settings & Suppression.
- Suppress selected (N) - per-issue suppression for every selected row.
- Move "<filename>" to Trash... - soft-deletes the asset (single-row selection).
- Move selected assets to Trash... - soft-deletes every distinct asset path in the current selection. A single confirmation dialog lists everything; deletes go through Safe Delete and record one Action History entry.
- Filter > Filter to this rule - reduces the table to findings for the same check.
- Filter > Filter to this folder - reduces the table to findings under the same folder.
- Filter > Clear filters - resets all filters.
- Rule > Suppress whole rule ("<rule>") - per-rule suppression: silences every finding for this check, project-wide.
- Rule > Open Checks Reference - opens the online Checks Reference anchored at the matching category.
- Rule > Severity - submenu to override the rule's default severity (Info / Warn / Error / Critical) for this project.
Scope
The scope picker controls what the Doctor scanner sees:
| Mode | Behaviour |
|---|---|
| All assets | Default. Scans everything under Assets/ the per-module collectors expose. |
| Selected folder | Scans only the folder currently selected in the Project window. |
| Custom paths | Two text areas: an include list and an exclude list. Both accept literal folder paths or globs (e.g. Assets/Game/**, Assets/Plugins/**). Globs collapse to their longest literal folder prefix; excludes additionally match anywhere in the path. |
Two project-wide scope toggles live under Settings > Scope: Include /Demo and /Demos folders and Include /Editor/ folders. Both default off so imported package noise doesn't drown the signal. Packages/ and /Tests/ are always skipped by the Doctor; the Project Inventory and Safe Delete always walk the full Assets/ tree regardless.
--scope-include / --scope-exclude) apply when running EDP from CLI / Batch Mode.
Scene Pilot Pro detection
If Scene Pilot Pro is installed in the project, the Doctor automatically shows the Scenes tab and the next scan runs every SPP ISceneCheck across every scene plus every prefab whose check is decorated as prefab-safe. No toggle is required - the bridge asmdef is auto-gated by the EDP_SPP_PRESENT versionDefine. Remove SPP and the Scenes tab disappears on the next recompile. See SPP Bridge for the full integration.
Exporting reports
Below the findings table the toolbar exposes three export buttons: JSON, CSV and HTML. All three share the same report schema. Use JSON for programmatic post-processing, CSV for spreadsheet review, HTML to share with the team or attach to a ticket.
Apply All Auto Fixes
The button at the top-right of every module tab (and a project-wide variant on the Overview tab) batches every auto-tier fix in the current filter set. Before anything runs, a confirmation dialog lists each fix grouped by check and by asset. Reject or accept; on accept, fixes apply sequentially and the whole batch is recorded as a single Action History entry that reverts as one.
Suggest an improvement
Help us improve this documentation page.