Quick Start
Chemistry Flasks for Unreal · Quick Start
Each flask is a blueprint that you drag and drop into the level. Its liquid is customized with a material instance.
If the pack is not in your project yet, add it first as described in Installation.
1. Open the preview map
Open PreviewMap in Content/ChemistryFlasks. It contains all the blueprints of the pack.
2. Add a flask
Locate the blueprint of the flask you want in its Blueprint folder, for example ChemistryFlasks/1000ml_Beaker/Blueprint/BP_Beaker_1000ml_Blueprint, and drag and drop it into the level.
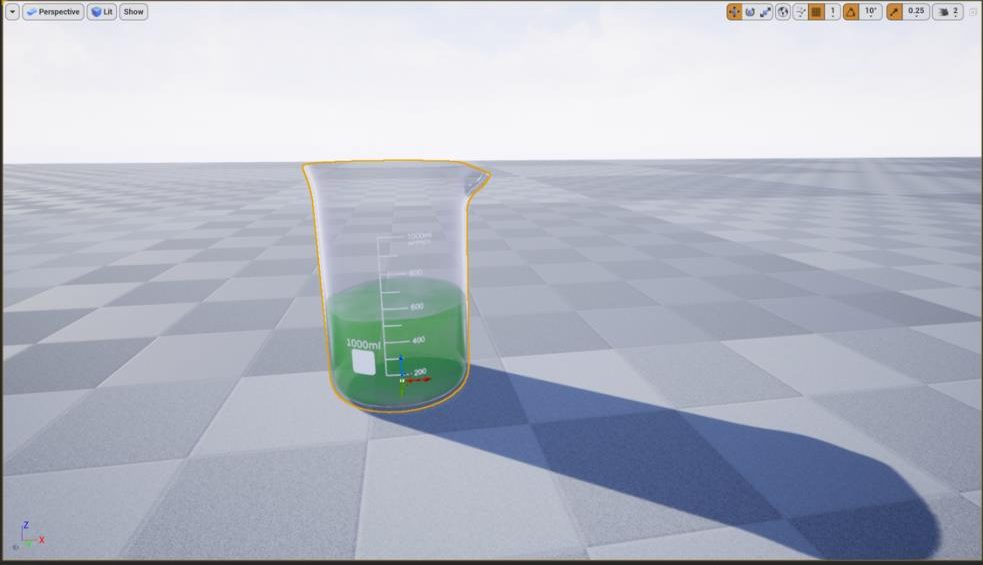
3. The parts of a flask
Each blueprint contains four parts:
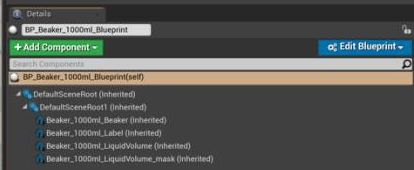
| Flask | The glass flask. If you remove it, the liquid appears to float in the air. |
| Label | The label of the flask. You can remove or replace it. |
| Liquid volume | The liquid. It uses the raymarching liquid material. |
| Liquid volume mask | A hidden part that renders to the custom depth. The liquid uses it to compute the distance to the back of the flask. |
4. Change the liquid
Select the liquid volume part of the flask. Its material is a material instance of M_LiquidVolume, stored in the Materials folder of the flask, for example MI_LiquidVolume_Beaker_1000ml. For the 1000 ml and 500 ml Erlenmeyer flasks, the folder is named Material. Double-click it to change the fill level, the colors and the other settings, or assign your own material instance created from M_LiquidVolume. See Liquid Material for every setting.
Suggest an improvement
Help us improve this documentation page.