Setup
beginner conceptsVolumetric Fog & Mist 2 (URP) · Core Concepts
Setup & Configuration
Complete these steps to configure your URP project for Volumetric Fog & Mist 2.
Step 1 — Install Universal Render Pipeline
Open Window > Package Manager, find Universal RP and click Install (version 14+ recommended for Unity 2022.3+).
Step 2 — Assign the URP Asset
Go to Project Settings > Graphics and assign a Universal Render Pipeline Asset. You can use the asset included in the demo folder (Volumetric Fog 2/Demo/URP Pipeline Settings).

Step 3 — Enable Depth Texture
Double-click the URP Asset to open its Inspector. Enable Depth Texture. Enabling MSAA is also recommended.
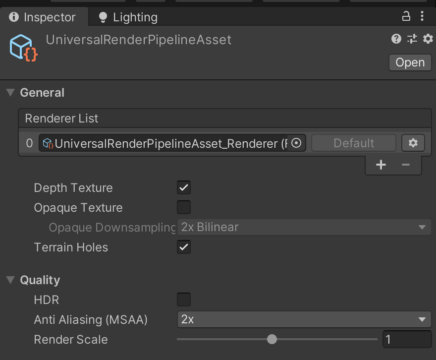
Important: Check both Project Settings > Graphics and Project Settings > Quality. Each quality level can reference a different URP asset — enable Depth Texture in all of them.
Step 4 — Verify Renderer Settings
| Setting | Location | Required Value |
|---|---|---|
| Depth Texture | URP Asset | Enabled |
| Depth Texture Mode | URP Asset | After Opaques or Depth PrePass |
| Transparent Receive Shadows | URP Renderer Data | Enabled (for fog shadow reception) |
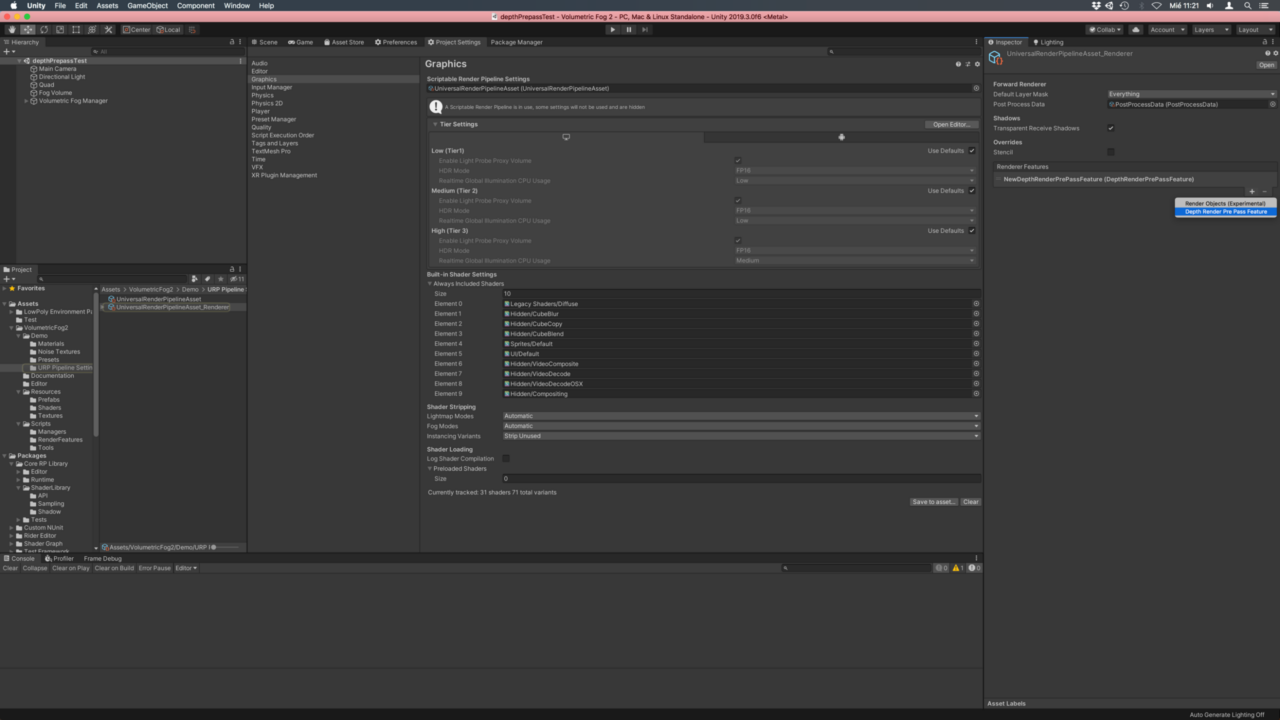
Optional — Render Features
For advanced transparency support (depth pre-pass, depth peeling), add these render features to your URP Renderer Data asset:
- Open the Forward Renderer asset (double-click from the URP Asset).
- Click Add Renderer Feature and add DepthRenderPrePassFeature.
- Optionally add the Volumetric Fog 2 Render Feature for depth peeling support.
Video Setup Guide
Was this page helpful?
Suggest an improvement
Help us improve this documentation page.